Security tables and columns are hidden from the data model, but can be seen when configuring dynamic member security logic in the Admin console. Member Security allows admins to define security preferences for specific member elements within each hierarchy in the data model. This enables you to regulate which user roles will see which members in the hierarchy of a data model. In this scenario, member security can be set for these security tables and columns, and they can be used to build custom sets which are targeted to specified user roles using the PQL Identity functions when working from script mode.
Security and distribution tables and columns can also be configured in such a way as to create a logical flow that enables distribution based on security. For instance, by configuring a distribution table consisting of users or roles, and a security table that designates which member elements from a security table each of those users or roles can see, a flow is configured that enables users to dynamically distribute publications to roles or users in the distribution table according to the members they can see in the security table.
Importantly, security tables are ONLY visible in the security editor for this purpose. They will never be shown to end users for normal analysis, scripting, or logic.
How to Set Security Tables
Any table can be marked as a security table from both the Properties panel, and the table context menu.
Table Properties Panel
To set a security table from the Properties panel, click on the table. From its Properties panel, enable Security (green highlight below); the table will be displayed with a red border and its columns will be hidden and displayed with padlock icons.
To stop this being a security table, clear the 'Security' checkbox.
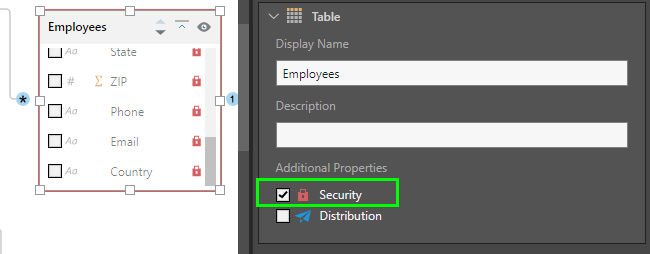
Table Context Menu
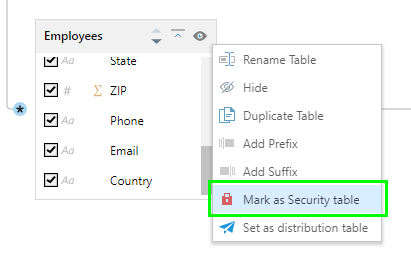
To set a security table from the context menu, right click on the table and select 'Mark as security table' (green highlight below).
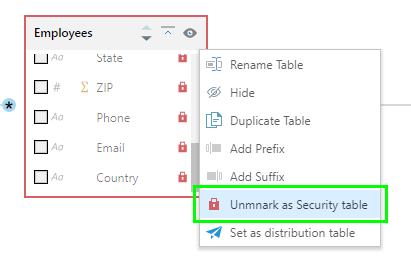
To unmark the security table, right click on it and select 'Unmark as security table' (green highlight below):
Security and Distribution Tables
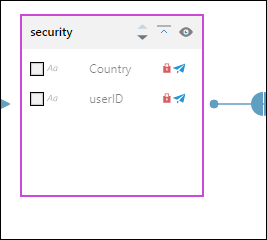
A table marked as both security and distribution will be displayed with a purple border and both security and distribution icons on its columns.
How to Set Security Columns
Like tables, security columns can be set from both the Properties panel and the column context menu.
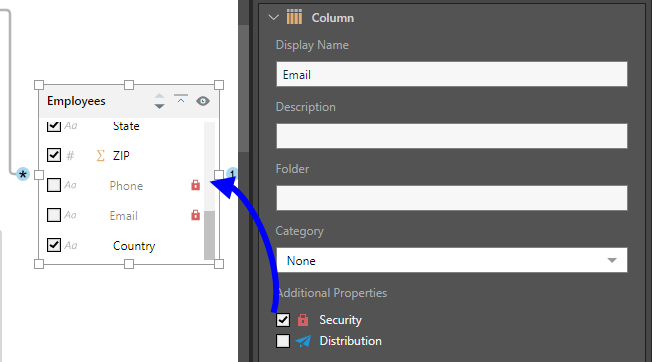
Column Properties Panel
To set a security column from the Column Properties panel, click on the column and select Security from the Properties panel; the given column will be hidden and displayed with a padlock icon (blue arrow below):
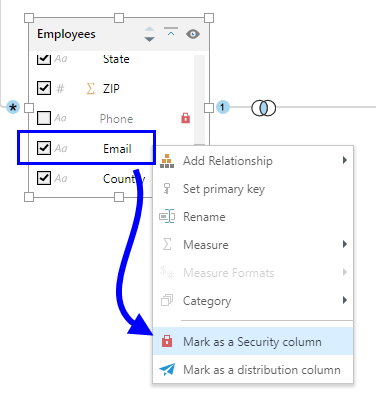
Column Context Menu
To set a security column from the column context menu, right click on the relevant column and select 'Mark as security column' (blue highlight below).
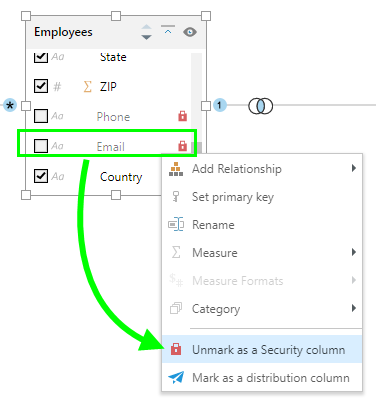
Unmark a security column from the context menu by right clicking on it and selecting 'Unmark as security column' (green highlight below):
Security and Distribution Columns
Columns marked as both s security and distribution will be displayed with both the lock and distribution icons:
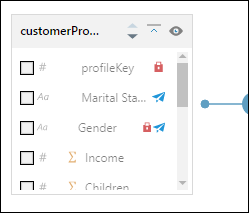
Security tables and columns are also marked as such from the Columns panel.